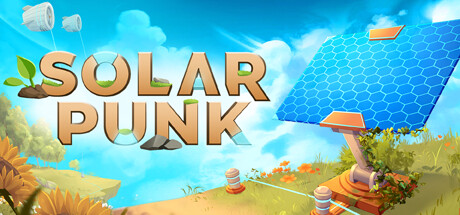
 Survival
Solarpunk Guide
Survival crafting, base building, power and island logistics — the data-first wiki for the cozy-but-unforgiving survival builder.
Survival
Survival crafting, base building, power and island logistics — the data-first wiki for the cozy-but-unforgiving survival builder.
The game looks cozy, but progression is still gated by the same hard questions every survival builder asks: where does your water come from, how reliable is your power, which station unlocks the next leap, and when is it finally safe to leave your starter island. This guide hub is organized around those questions rather than shallow filler pages.
Every guide below is checked against in-game behavior and official patch notes before publishing. The full Solarpunk wiki lives on the sub-site, where deep system breakdowns replace walls of text with tables you can actually use.
| Step | Goal | Why it matters |
|---|---|---|
| 01 | Gather wood, stone, fiber until tools are online | Your first efficiency spike is the axe and pickaxe that let you gather twice as fast. |
| 02 | Secure water before you overbuild | A basic shelter matters, but water shortages break runs sooner than ugly housing does. |
| 03 | Bring power online before pushing automation | Two solar panels and battery storage beat scattered half-powered machines. |
| 04 | Repair the airship only when the home island is stable | The first expedition is strongest when you can leave and return without the base falling apart. |
A practical order for your first 10 hours: tools, water, shelter, early farming, power, and the first airship repair.
Explore guide →Which stations matter first, how to avoid dead-end recipes, and when to pivot from handcrafting into automation.
Explore guide →Solar and battery planning for bases that stay stable through day-night swings.
Explore guide →When conveyors, drones and sorters begin saving more time than they cost.
Explore guide →Repair timing, cargo priorities and island-hopping logistics.
Explore guide →Biome planning for resource routes, outposts and main-base decisions.
Explore guide →Water is the real early-game bottleneck. Build a Rain Collector before you over-invest in expansion.
Treat your starting island as a stable hub and new islands as specialist outposts until logistics are online.
Do not rush automation before power is reliable. A weak grid turns every upgrade into extra chores.
When your first airship trip succeeds, bring home copper and iron before you chase aesthetics.
Tools are the spine of everything else. Solarpunk gates each tier behind both material availability and a crafting-station upgrade, so the tool you are holding literally determines which ores you are allowed to mine next. The practical rule is to upgrade the moment you have the materials — the efficiency gain pays for itself inside an hour of play, and the durability jump means far fewer trips home to re-craft a broken pick.
| Tier | Tool Set | Materials | Durability | Unlock Requirement |
|---|---|---|---|---|
| T1 | Flint Tools | 3 Flint + 2 Wood Stick | 30 uses | Starting gear / beach rocks — emergency use only |
| T2 | Wooden Tools | 6 Wood Planks + 2 Vine | 50 uses | Crafting bench (tier 1) — bare minimum for survival |
| T3 | Copper Tools | 4 Copper Bars + 2 Wood Stick | 120 uses | Smelter + Copper Ore — the first real upgrade |
| T4 | Bronze Tools | 4 Bronze Bars + 2 Wood Stick | 180 uses | Bronze Alloy (Copper + Tin) — cheap to make in bulk |
| T5 | Iron Tools | 4 Iron Bars + 2 Wood Stick | 300 uses | Iron Ore + Blast Furnace — the mid-game workhorse |
| T6 | Steel Tools | 4 Steel Bars + 2 Iron Stick | 500 uses | Steel Alloy (Iron + Coal) — last manual tier most players need |
| T7 | Titanium Tools | 4 Titanium Bars + 2 Steel Stick | 800 uses | Titanium Ore from deep mining or remote islands |
| T8 | Solarsteel Tools | 4 Solarsteel Bars + 2 Titanium Stick | 1200 uses | Solar Furnace + rare alloys — best non-automated tools |
| T9 | Automated Tools | Varies by machine type | Infinite (needs power) | Advanced Crafting + a real power grid |
Match the tool to the resource and you cut gathering time dramatically. A Steel Axe (or an Automated Lumbermill) is the right answer for trees; stone and ore want a Titanium Pickaxe or an Automated Quarry; a Copper Shovel handles soft dirt and sand; a Bronze Sickle harvests multiple crops in one swing. Deep rare minerals need a Solarsteel Pickaxe plus a light source, and you should carry spare power cells down with you.
One caveat that catches people out: tools have durability and simply vanish when it hits zero. Always keep a spare in your inventory before a long expedition. Enchanting, unlocked at the Iron tier, is also worth the detour — a well-enchanted Steel Pickaxe can outperform an unenchanted Titanium one, so upgrade the tool you use most before chasing the next tier.
Your floating island starts with no natural water source. Every drop has to be collected, stored, purified and distributed by infrastructure you build, and a single dry season without that infrastructure can wipe a harvest and kill your character. The pipeline has five stages — collection, storage, purification, distribution, recycling — and they must be built in that order. You cannot purify water before you have a network to move it through, and skipping stages is the most common cause of total water-system failure.
| Building | Stage | Cost | What It Does |
|---|---|---|---|
| Water Collector | Early game | 10 Wood, 5 Metal Sheets | Passively gathers rainwater and condensation. Must sit under open sky — a roofed or shaded collector produces nothing at all. |
| Wooden Bucket | Early game | 3 Wood, 1 Rope | Manual transfer from collector to crop plots. Labour-intensive, but essential before automation exists. |
| Solar Pump | Mid game | 15 Metal Sheets, 5 Copper, 2 Solar Panels | Actively pulls water from tanks and pushes it through pipes. Needs a power connection, so build it after the grid. |
| Water Pipe | Mid game | 2 Copper per segment | Links pumps, tanks and plots. Plan the routes before you place pumps rather than after. |
| Large Water Tank | Mid game | 20 Metal Sheets, 10 Rubber | Buffers drought. Chain three or more if you want to survive multi-day dry spells without rationing. |
| Water Purifier | Late game | Mid-to-late game recipe | Filters contaminants. Mandatory during toxic rain events — place it inline before the irrigation network. |
| Sprinkler System | Late game | Copper + advanced components | Automatically waters nearby plots and removes manual watering entirely once the pipe network is stable. |
Weather decides how hard this system has to work. Rainy days collect roughly three times faster than sunny ones, which is when you should be over-filling every tank you own. Sunny stretches only give you ambient condensation, so check collectors at dawn and dusk. Toxic rain collects at a normal rate but the water is contaminated — never irrigate with it unfiltered. Storms give the highest yield but can damage unsecured structures and block a collector’s sky view with debris. A multi-day drought collects nothing at all; if the tanks run dry, drinking water beats crops and you should abandon the non-essential plots without hesitation.
Automation is the reward for a stable grid, not a shortcut around one. Basic automated setups want somewhere around 50 kW of continuous output, and a fully automated base wants 200 kW or more — the Automated Quarry alone draws about 30 kW while it is running. That means solar panels for daytime generation, battery banks so the night does not stall everything, and power lines actually connecting the parts. Running out of power mid-mining leaves machines idle and the whole chain backed up behind them.
The sequencing that works is boring and reliable: get tools to at least Copper, secure water, then build generation and storage, then automate the chore you repeat most often. A conveyor or a drone only earns its cost when it removes a task you were doing by hand several times a session. If a new machine adds more maintenance than it saves, you built it a tier too early — that is the clearest signal the base is not ready for the next step.
Base-building walkthroughs, power-management math, co-op logistics and the complete beginner route — all on the dedicated sub-site.
GameGuideHub is a growing network of independent game guide sites. Every site is dark-themed by default, loads in under two seconds, and puts the answer — the table, the tier list, the build — above the fold.
No popups. No autoplay. One quiet ad slot, maximum. Just the data you need before your next in-game night falls.