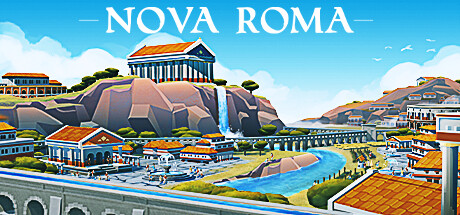
Nova Roma City Builder

Nova Roma Guide

Plan districts, shape trade routes, and grow your Roman city-state with a guide organized around real growth bottlenecks rather than a list of buildings.

Read the full wiki → Start here
Guide Pages
15+
Buildings Covered
30+
Steam Reviews
2.0k
Positive
94%

Nova Roma is a Roman city builder from Lion Shield Studios. Your goal is to grow a small settlement into a thriving city-state by balancing production, trade routes, laws, and expansion — and the difficulty curve comes almost entirely from how those four things interact rather than from any single system being complex on its own.

The building system is grid-less: you freely place houses, shops, farms and decorations anywhere, rotating and offsetting them however you like, and the voxel art style supports that level of detailed customization. That freedom is a trap for new players. Because nothing forces you into a tidy grid, it is very easy to build a city that looks organic but forces citizens to walk absurd distances between home, work and services.

This portal condenses the Nova Roma wiki into the tables and planning rules that actually change city outcomes. The deep-dive pages — buildings, layouts, resources, citizens, economy, research and trade — live on the sub-site, each one written around a specific bottleneck instead of a general overview.

City Read Order

Read by phase
01

Secure Food, Cash And Labor

Start with the beginner, buildings and resources pages so your first expansion does not outrun the production base that has to pay for it.

02

Shape Districts Before Sprawl

Move into layouts and citizens once growth starts creating housing, service-reach and beauty pressure. Fixing spacing later is far more expensive.

03

Scale Through Trade And Research

Use the economy, trade and research pages when the city core is stable enough to support longer-horizon investment rather than firefighting.

Key Buildings

Trajectory changers

These are the unlocks that most often change a city's trajectory. Everything else is optimization around them.

BuildingEffectPriority
Town HallUnlocks city management and tax control. Your administrative center and the hub for citizen registration.Tier 1
MarketplaceCreates the first reliable income multiplier in the city economy.Tier 2
UniversityTurns research pacing into a real strategic lever rather than background progress.Tier 3
Tourist PierOpens a scalable late-economy revenue stream built on city appeal.Tier 4

Full building guide →

Crop Tiers And What They Power

Farming

Farms grow 13 different crop types across 4 tiers of farm upgrades, and crops feed production buildings directly. Plan crop ratios around the buildings you intend to operate, not around what looks balanced on the map.

Farm TierCrops UnlockedPowers
Tier 1Grapes, Corn, WheatBakery (Corn + Wheat) and Winery (Grapes)
Tier 2Beeswax, Cotton, RoseHattery — your first apparel building
Tier 3Hops, Potatoes, Tomatoes, LettucePub. Farm surface area doubles at this tier
Tier 4Pumpkin, Lavender, Medicinal HerbsCity-rank buildings: Apothecary, Perfumer, Cathedral, Restaurant

Key resource: Hops have the highest demand of any crop. Plan for significantly more Hops fields once Tier 3 unlocks — the Pub alone requires 75 Hops against 25 of each other crop, so roughly 3x the field count.

Essential Guides

Where to start
Essential

Complete Building Guide

Every building explained with production roles, unlock pressure, and placement logic that matters during real growth.

Open guide →
Popular

Layout Masterclass

District spacing, service reach, and waterfront planning so the city feels organized before it becomes expensive.

Open guide →
New Player

Beginner's Guide

The first-hour priorities that stop early expansion from outrunning food, labor, and tax stability.

Open guide →
Strategy

Research Tree Guide

Unlock order for steady growth instead of scattered experiments that leave production half-online.

Open guide →
Advanced

Economy And Income

Taxes, production chains, and tourism planning once the city core is stable enough to monetize.

Open guide →
Guide

Citizen Management

Worker progression, housing pressure, and happiness tradeoffs that determine whether growth stays smooth.

Open guide →

Quick Tips

Planning pressure
Layout

Place beauty between houses and services, not in isolated showpiece blocks. Decoration that nobody walks past is decoration that does nothing.

Economy

Open trade once basic resource flow is stable. Early chaos compounds if external income hides internal weakness.

Planning

Research should remove the next bottleneck, not simply unlock the newest toy on the tree.

Quality

Walk the city visually and watch travel paths. Most ugly layouts are also inefficient layouts.

Logistics

Warehouses have a transport range — production buildings inside it automatically access stored goods. Place them between farms and processing buildings.

Labor

Upgrading a Worker into an Artisan can leave a Worker job slot empty. Watch tier ratios before pushing housing upgrades.

Read Next By City Problem

Bottleneck first

FAQ

Common questions
What kind of city builder is Nova Roma?
A Roman city builder from Lion Shield Studios where you grow a small settlement into a city-state by balancing production, trade routes, laws and expansion. Building is grid-less — you place houses, shops, farms and decorations freely, rotating and offsetting them as you like — and the voxel art style is built around that detailed placement freedom.
How do citizen tiers work?
Citizens progress from Workers, the foundation workforce staffing farms, basic production and warehouses; to Artisans, the skilled labor that runs Bakeries, Wineries, Hatteries and Pubs; to Bourgeoisie, the elite class that staffs advanced buildings and pays the highest tax income. Each tier unlocks new buildings, has different needs, and requires those needs to be satisfied before an upgrade is possible. Houses upgrade alongside their residents.
Which crop should I overproduce?
Hops. They have the highest demand of any crop in the game, and the Pub alone consumes 75 Hops against 25 of each other input. Once Tier 3 farms unlock, plan roughly triple the Hops fields you would allocate to any other crop, or the Pub and Apothecary will sit idle waiting on supply.
Should I build one big city or several towns?
Several, specialised. You can develop multiple towns connected by trade routes, and the default map gives you three: Belvau as the main administrative hub, Fontebrac for agriculture, and Rocemarée for tourism. Give each one a focus rather than duplicating a full economy in every location — trade routes are what tie the specialisations back together.
Does city appearance actually matter?
Yes, in two ways. Tourism income scales directly with your town's appeal, so hotels, scenic routes and attractions such as the Lighthouse, Art Atelier, Monumental Ruins and Obelisk translate beauty into revenue. Separately, ugly layouts are usually inefficient layouts — if a district looks awkward, walk it visually and you will normally find citizens taking long travel paths between home, work and services.

Want the full city-planning breakdown?

The complete Nova Roma wiki — buildings, layouts, resources, citizens, economy, research and trade — lives on the sub-site with input tables and district planning rules.

Open the full wiki →

About This Hub

GameGuideHub is a network of data-first game wikis. The Nova Roma hub is organized around growth bottlenecks — food, labor, service reach, and income ceilings — rather than around a catalogue of buildings.

Pages are reviewed against in-game behavior before publishing. If a page saves your city from a labor spiral, you can support the project on UniFans — link in the footer.

Reviewed: July 2026
Developer: Lion Shield Studios
Focus: districts, production chains, trade scaling
Sub-site: novaroma.gguidehub.com

Last updated: July 2026